If you’re looking for something sweet and satisfying, my Three-Ingredient Chocolate Coconut Balls are easy to make, rich in flavor, and healthier than store-bought.
IMG1
They taste so good you won’t believe how good they are for you – that’s what I love most about Coconut Bliss Balls. My second favorite? They’re not baked with chocolate coconut, so making this dessert requires minimal effort.
These coconut balls are gluten-free desserts with a rich chocolate coating. They are easy snacks that can be used as great gifts or desserts for friends. I’m a big fan of coconut and keeping a bunch in the freezer really helps control chocolate cravings.
If you want to enhance your dessert, coconut is a great ingredient to add to your recipes. Not only is it sweet, but it is one of the healthy fats that helps keep teeth and bones healthy and also keeps you from getting dehydrated.
IMG2
Ingredients
Shredded coconut: I use unsweetened desiccated coconut for the chocolate coconut balls because it is easy to process. You can buy them at the store or make your own from fresh coconut if you’re brave enough.
Condensed Milk: Canned sweetened condensed milk works great. If you’re vegan or don’t want to use condensed milk, you can use almond milk and sugar, evaporated milk, coconut milk, or coconut condensed milk to help hold the ball together.
Dark Chocolate: The best dark chocolate is usually 65-80% cocoa solids, but you can choose how dark you want it to be based on your taste. Use chips or semisweet chocolate chips; Both work. If you don’t like dark chocolate, you can use milk chocolate.
IMG3
How to Make Chocolate Coconut Balls
If you’re making your own homemade shredded coconut for this delicious treat, you’ll want to start here. You can follow my easy guide to making your own desiccated coconut here, covering everything from how to open the coconut, peel it, and then dry it to turn the fresh flesh into delicious flakes.
Form into balls and shape
In a large bowl, mix condensed milk with coconut particles. I like to mix it directly with my hands, but you can use a spoon or a small cookie cutter. Then, use about 1-2 tablespoons of the mixture to form a ball. You can make these as big or small as you want. However, I recommend sizing them around 2-3 bites (about a 1 inch ball).
IMG4
Place the mixture on a baking tray and put it in the fridge to cool – I recommend 15-30 minutes or longer. If you are in a hurry, freeze it for 5-10 minutes.
Cover with chocolate
While the coconut mixture is cooling, melt the chocolate in a small bowl. You can heat it in the microwave for 20-30 seconds until it melts (halfway through to prevent the chocolate from burning) or use a double boiler or double boiler.
Place the frozen balls into the chocolate. You can use a spoon, fork, or wooden skewer (so they look like little lollipops) to help you drop them. Make sure the coconut is completely covered with chocolate.
IMG5
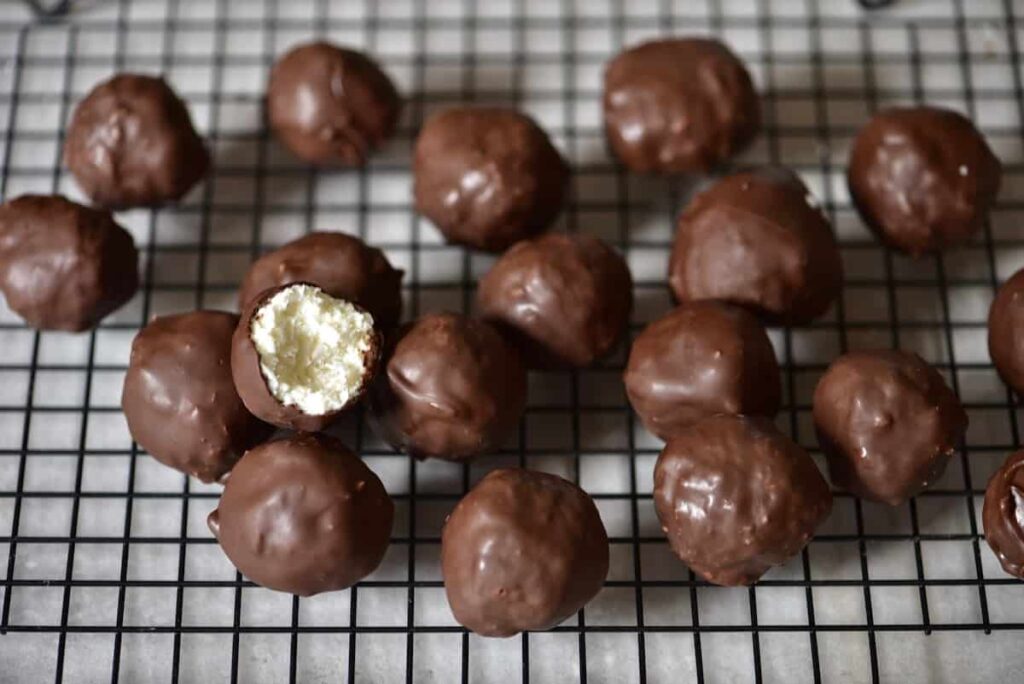
Then put the items on the rack to dry. Place a piece of parchment paper underneath to catch any excess chocolate.
You can leave it as is or sprinkle some sea salt on it; This will enhance the taste of the chocolate.
Finally, put it in the refrigerator and cool it again until the chocolate is frozen.
IMG6
Storage
You can store coconut chocolate balls at room temperature while the chocolate is freezing. Just stay warm or the chocolate will start to melt! They can be stored this way for up to five days.
In the refrigerator: Once the coconut balls are frozen, transfer them to an airtight container. Store these in the refrigerator. They last up to two weeks, but I’m lucky if they last a few days at my house!
In the freezer: It’s easy to make this dessert ahead of time and freeze it. Once the coconuts have hardened, transfer them to a freezer-safe bag or container and freeze. They can be stored for up to three months. So if you make a lot of it and want your snacks to last longer, this is a good option. You may need to let it thaw before enjoying.